Hands-on Sustainable Git and GitHub
Contents
1. Objective #
This tutorial is meant to be an easy and hands-on guide for Git and GitHub. To achieve this, simple and core understanding of both tools will be presented, such that the reader can develop simple but effective workflows that allows it to integrate them sustainably to their everyday toolset.
2. Scope #
This tutorial will present the basic necessary commands to initialize, control and systematically update local (i.e. in your computer) and remote (e.g. in GitHub) repositories. This tutorial will not delve into plumbing and porcelain or non-essential Git commands since there is plenty information out there (including Git’s documentation).
3. Introduction #
Both Git and GitHub are extremely useful tools for version control and collaborative work. In this sense, workflows usually consist of working on something locally using Git — either forked/cloned from a GitHub repo or something made locally from scratch, on your own computer — and then “synchronizing” that to GitHub.
A GitHub repository can be understood, for the moment, as a folder which contains objects (i.e. files and subfolders). So far, you might have a bunch of objects that you would like to push from your local repository (a folder in your local computer) to your GitHub account, or you might want to join a project that is being developed on GitHub. For either case, this tutorial aims to provide the necessary commands and explanation to be able to seamlessly work with both tools and to be able to collaborate and version-control your work.
A note from the author
While there is plenty information about Git — it’s mesmerazing how much there is out there about Git, namely tutorials — I had trouble finding a summarized way to get them both working seamlessly. Furthermore, while there are plenty quick guides to just make them work, what I did not find the tools to maintain them — a set of tools that would allow oneself to not only set them up, but also to create simple and sustainable workflows such that you can keep using them as part of one’s day-to-day.
4. Requirements #
Since this is a beginner-level guide, the only requirements are the following:
- Have Git installed on your computer. MacOS and Linux users rejoice, since it is (most likely) already installed in your computer and is accesible via command line (e.g. Terminal on MacOS). In any case, Git can be downloaded from its own
webpage. If you’re on a Mac, then you can easily install Git as part of Xcode’s developer tools, running
xcode-select --installon the Terminal. - Have a text editor or IDE installed. A text editor for “coding” is of great help since it can help you organize projects, visualize your code better, and so on.
- Have a GitHub account already created. This will not be explained since creating a GitHub account is pretty rudimentary — just like creating any other type of online account.
- Have a little knowledge about how to use a command line interface (CLI), e.g. bash.
I am doing this on MacOS, using bash version 3.2.57 and VSCode.
5. Setting Up Git for the Very First Time #
git configdocumentation.
The best way to check if Git is installed on your computer is to run the following:
$ git --version
git version 2.20.1 (Apple Git-117)
$ which git
/usr/bin/git
As you might already be aware of, in bash all commands are those after the $. In this case, git --version will return the current version of git installed in your computer and which git will return which git is being used, which is a way of indicating where it is installed. By default, it should be installed in /usr/bin/.
Now, you have to configure git. This is a one-time process and can be modified in the future if needed. To do this, the git config command will be used as follows:
$ git config --global user.name "Your Name"
$ git config --global user.email your_name@mail.com
This information will be helpful when you commit objects (when you “sync” your documents), since it will allow git and GitHub to create a history of whatever it is you want to keep track of — to version-control.
Finally, if you have installed a text editor, you might want to use it with git. Setting up your text editor with git will require to pass in an argument that depends on the text editor. This is a good
link with three examples, for Atom, Sublime Text and TextMate. In this tutorial, it will be set for Atom:
$ git config --global core.editor "atom --wait"
This is it. The very-first git setup is done. You can always check the status of this configuration with:
$ git config --list
credential.helper=osxkeychain
user.name=Your Name
user.email=your_name@mail.com
color.ui=auto
core.autocrlf=true
core.editor=atom --wait
filter.lfs.clean=git-lfs clean -- %f
filter.lfs.smudge=git-lfs smudge -- %f
filter.lfs.process=git-lfs filter-process
filter.lfs.required=true
More detailed information about this initial setup
here. Just one important thing to note in case you are not checking out the previous link, is that git stores configuration at three different levels: repository-level, user-level and system-level. The --global flag allows to modify the user-level configuration.
6. Initializing Git #
git initdocumentation.
In proper git terms, git uses commits to keep an “official” track of your local working directory — i.e. to version control —, and therefore, of its contents. To do this, git gives to each object inside the working directory a unique “id”, and each commit you make is like a snapshot of all the contents in the working directory — e.g. the “Projects” folder, for the sake of this example. A repository (or “repo”), then, is nothing more than the collection of all these snapshots. As you might have deduced already, this allows you to “go back in time” if there is a change you made that you want reverted.
git works on a per-tree basis, being the nodes and leaves the subfolders and files, respectively. When you initialize git on a local folder — i.e. the working directory — to later have it “synchronized” to GitHub, any modification you make inside this folder — to any file or subfolders — will be tracked and stored every time you commit these changes. Later, whenever you are ready, you will be able to push this updated content to GitHub.
The first step, then, is to initialize git in the working directory where you have the material you have been working on. In this example, it will be the Projects/ folder. Navigate, using cd, to your “Projects” folder and, once there, run:
$ git init
Initialized empty Git repository in /Users/<Your username>/Projects/.git/
git has initialized a repository in your Projects/ folder and has created a .git/ folder inside. Here, it will store all the information necessary to keep the version-control — to keep a repository — of whatever you do in the working directory — e.g. the “Projects” folder.
A repository can be directly initialized by setting up a remote repository — this is related to forking and cloning. However, this will be explored later on. If you want to collaborate on an existing project, I would recommend to still go through all the following sections.
Finally, note that there is plenty information about how git works at the object-level. One of the best documents I have found is “Git from the bottom up,” by John Wiegley. You can find it
here. Just a heads up, this document got a little too technical for me at the beginning, but it’s worth it if you want to get a better understanding of the inner working of git.
7. Adding Files and Subfolders and the Repo Status #
git adddocumentation.git statusdocumentation.
At the moment, I only have two files inside Projects/, called hello-world.py and hello-mars.py. The content of each file is the following:
hello-world.py:
if __name__ == "__main__":
    print('Hello World')
hello-mars.py:
if __name__ == "__main__":
    print('Hello Mars')
Because these files are inside the folder where git was initialized (Projects/), git is now able to “see” what is inside the working directory and give a status to each object in the directory. There are two states that a file can have:
- Untracked; or,
- Tracked
The command git status is used to know which is the status of your repository at the moment — i.e. to know the current state of each of the objects (as long as they are not unmodified; see this definition below). For instance, if I run this command, I will get the following:
$ git status
On branch master

No commits yet

Untracked files:
  (use "git add <file>..." to include in what will be committed)

	hello-mars.py
	hello-world.py

nothing added to commit but untracked files present (use "git add" to track)
But what do these status mean? Well, untracked means that git is aware that the files are there, in the working directory, but it is not following their history yet — it is not controlling their versions. Think of it as an object outside the picture frame: when you take the snapshot — i.e. when you commit the changes — these objects will be out of the picture.
Say I am done working on hello-world.py and hello-mars.py and I want to have them ready for my later push to GitHub. The next step, then, is to start tracking the files using git add. The argument add means that you are adding these files to git's index. The index is the “tool” git uses to track — keep the version control — of everything in the working directory by giving each object (files and subfolders) a unique “id”. Now, once you have started tracking something, these tracked objects can have three “sub-states”:
- Staged;
- Modified; or
- Unmodified
A staged object is an object that is ready to be committed — ready for the snapshot. Modified and unmodified states are given to files or subfolders in the working directory that have been previously committed:
- Modified: the object has been modified since the last time it was committed. E.g. you changed a line of code in a file, you deleted a file from a subdirectory.
- Unmodified: the object has not suffered any modifications since the last time it was committed.
git documentation provides a very good insight regarding these states. You can check it out
here.
Continuing with our example, I am now going to add both Python scripts to the index so that they will be ready to be committed. git add allows to add files manually or in group. To add a single file, you can use git add '<file_name>' or git add '<folder name>/<file_name>'. To add an entire subdirectory, use git add '<folder name>/'. To add everything in the working directory, use git add *. Single (or double) quotes, '', are only necessary if there are spaces in the file name or path. Given that I want to add all the files in my working directory, I will proceed as follows:
$ git add *
warning: LF will be replaced by CRLF in hello-mars.py.
The file will have its original line endings in your working directory
warning: LF will be replaced by CRLF in hello-world.py.
The file will have its original line endings in your working directory
The files have been successfully added to the index of the repository and are ready to be committed. This can be checked up by running git status:
$ git status
On branch master

No commits yet

Changes to be committed:
  (use "git rm --cached <file>..." to unstage)

	new file:   hello-mars.py
	new file:   hello-world.py
An important note on git add
In short, every time you add a new object (file or subdirectory) to the working directory, you need to add it to the index using git add. Now, there is quite an important reason for that and it is explained below. However, if you are in a rush, just jump to the next section.
git add is used, as explained above, to add objects to the index. Once an object is added to the index, it is ready to be committed. Everytime an object is modified, it needs to be “re-added” to the index so that it will be ready (again) to be committed, and this process necessary because of how git is designed. I put emphasis on this since, at the beginning, my conceptualization of the adding-committing process was something like: once the object is added to the index (and therefore tracked), then, after each modification, the only thing remaining to do is to commit it — because it is indexed and it is being kept track of already. However, this was wrong.
git is a tool that has a unique way of tracking objects: it involves using an encrypted (SHA-1) “id” that is based on the content of the object (check John Wiegly’s “Git from the bottom up” link above; I will explain a bit more of this encryption later on). This means that, every time you modify an object, its “id” will change. And this gives git two main advanges (that allowed it to, according to what I read from more experimented Version Control System (VCS) users, to be more efficient in doing its job):
gitdoes not keep copies of each version of your files: this allowsgitto use far less storage than if it were to keep each modified version you make of the same file; andgitallows you to design very specific workflows:gitis highly customizable when it comes to how you do your workflow, and allows you to fine-tune from your branching operations, to your “syncing” (push and pull), to managing “micro” modifications and moving through them back and forth.
However, the price for these advantages is a steeper learning curve when compared to other VCSs.
Below, we will see other ways to commit objects “straight away”, that is, without the necessity of doing git add, like when using git commit -a. However, at this point, it is important to remember that every single time you add a brand new object to the working directory, you have to git add it.
8. Modifying Staged Objects and Comparing Versions #
git diffdocumentation.
Modifying files is going to be part of your workflow — you are going to keep working on already indexed objects and add some new on your way. In this section, we will explain what happens when you modify an already-added-but-yet-committed file. We will continue with the previous example to make this more clear.
Say I forgot to add a line of code to my hello-mars.py script. I am going to add the missing line of code and my final script is going to look as follows:
if __name__ == "__main__":
    print('Hello Mars')
    print('You are so cold')
If I proceed to commit the files added in the previous section, the modified hello-mars.py will not be committed with the changes I made on it. The reason for this, as stated in the previous section, is that the current “id” — the indexed “id” — is the one generated for the original hello-mars.py, but not for the modified one. You can verify this by running git status:
$ git status
On branch master

No commits yet

Changes to be committed:
  (use "git rm --cached <file>..." to unstage)

	new file:   hello-mars.py
	new file:   hello-world.py

Changes not staged for commit:
  (use "git add <file>..." to update what will be committed)
  (use "git checkout -- <file>..." to discard changes in working directory)

	modified:   hello-mars.py
For git, there are now two different hello-mars.py. While in your computer’s directory you will only see one file, a unique hello-mars.py, for git there are two: the one you indexed before, using git add, and the one that has been modified. Now, in our example, it is easy to tell the content of each. But in case you forget what is in the indexed “version” of the file and what in the modified one, you can use the git diff <file name> command. This command will show you what has changed between the indexed object and the modified object:
$ git diff hello-mars.py
warning: LF will be replaced by CRLF in hello-mars.py.
The file will have its original line endings in your working directory
diff --git a/hello-mars.py b/hello-mars.py
index 8d5d7ee..cb311c7 100644
--- a/hello-mars.py
+++ b/hello-mars.py
@@ -1,2 +1,3 @@
 if __name__ == "__main__":
     print('Hello Mars')
+    print('You are so cold')
While the return of the git diff command might result a bit cryptic, it is actually easier to parse out than what you think. We will not go into the detail of how to do it (
here is a great and simple explanation for it by Robin Kim), but in short, the line of code beginning with a + was added. As a little extra, if you had made more modifications, you would have more “sets” of lines with a @@ ... @@ on top of them. Every group of lines between one @@ ... @@ and the next is called a hunk. A hunk is the git term for “change”. A hunk exists because you modified some lines of code in that section of the file and that is, precisely, the diff that git is showing you.
Because we want to have the latest hello-mars.py on GitHub, then we must commit the current version of it. For that, we can just proceed to add it again:
$ git add *
warning: LF will be replaced by CRLF in hello-mars.py.
The file will have its original line endings in your working directory
Since hello-world.py was unchanged and already tracked, the only file git added was hello-mars.py. Now our files are ready to be committed. If we run git status again, we will see the same output we got when we added the original files:
$ git status
On branch master

No commits yet

Changes to be committed:
  (use "git rm --cached <file>..." to unstage)

	new file:   hello-mars.py
	new file:   hello-world.py
9. Committing Objects #
git commitdocumentation.
As previously explained, committing allows git to store a “snapshot” of all the staged objects — of all the files added to the index — in the repository. In this sense, a sequence of commits creates a history that can tell how your repository has evolved over time. To commit files, the git commit command is used. Given that we are ready to commit the two Python scripts of our example, let us proceed:
$ git commit -m 'First two Python scripts. hello-mars.py includes a second print line.'
[master (root-commit) 7c30d25] First two Python scripts. hello-mars.py includes a second print line.
 2 files changed, 5 insertions(+)
 create mode 100644 hello-mars.py
 create mode 100644 hello-world.py
As seen above, the git commit command is passed in with the -m flag. The -m flag allows the user to add a message that will help create a better (more readable) history of the repository. It is optional, but highly recommended.
Note the return of the command. git explicitly indicates the branch, master, the type of commit, root-commit, and the first seven digits of the commit’s “id”, 7c30d25 (yes, commits also get a unique “id” that is stored as an object). In this case, the master branch is the default branch git created when we initialized the repository and the one we are working on at the moment. A branch is, in short, a sequence of commits. Branches allow you to, at a given point, branch out and start diverging from your main project to, let’s say, try something new that you still don’t want in your “official” code — in your master branch. If that thing you branched out turns out to be something you want incorporated into your master branch, then git allows you to merge this “experimental” branch to the master branch. We will not delve into branches, since it is a very large topic and, at least for just keeping up a repo to showcase your work, it might not be necessary at the moment.
Now, a root-commit is the first commit you ever make in a repository. This means that the commit has no parent-commit — a commit before it. There are different kinds of commits and we will explore some more down the road.
Finally, a commit “id” is a SHA-1 value, and although being 40 characters long, git only presents the first 7 or 8, which is called the short SHA-1, and it is enough characters for git to recognize the commit.
A bit more about SHA-1 and why git uses it
This part is just additional information. If you are in a rush, skip it and jump to the next section.
So far we have talked about objects’ “id” and now of commits’ “id”. But why do they need a SHA-1 “id”? And, what is SHA-1 for that matter? Well, this comes down to the design of git, which was created by Linus Torvalds, the creator of Linux. Basically,
SHA-1 is a
cryptographic hash function that gets its input from the object you want to hash — the object you want to generate an “id” for — and produces a 40-character hexadecimal value. Now, SHA-1 is (was) used for encryption (now there are more secure SHA-X versions). But what is key to understand is that, given the nature of SHA-1 — i.e. a cryptographic hash function —, it will produce only one SHA-1 value for a given object. If you change anything in that object and you hash it again, its SHA-1 value will change. This allows git to give unicity to each of the objects that it is tracking. In Torvalds own words, SHA-1 in git “[…] It’s purely a consistency check.” In other words, SHA-1 does not provide any security features to git, it only makes it better at keeping track of your repository.
Finally, for practical purposes, git allows you to refer to any hashed object using a short SHA-1 value, which is the first 7 or 8 characters of the entire value. Given that each SHA-1 value is so different from the next one, 7 or 8 values are more than enough for git to identify which object you are referring to. If you are interested in how to use the SHA-1 value to refer to different objects in git, check out this
link.
10. Excluding objects with .gitignore #
When working on your computer, you might have noticed that some applications (programs) might generate some temporary files. In a broader sense, sometimes our own workflow might generate objects that, because of their nature, are temporal or we just do not care about tracking them and even worse, getting them into our GitHub repository.
git proposes a very practical solution for this — for excluding files from being tracked —, and it’s through the creation of a .gitignore file. For instance, if I create a subfolder in my working directory, because I am using MacOS, the OS will automatically create a .DS_Store file. This file is used by Finder on MacOS to keep information of the files and subfolders in a given directory. This is one file that, for instance, I totally do not want to showcase.
A .gitignore file is really a list of things you want git to exclude or to make sure it does not exclude. Given its broad use, there is information all around on how to create a good .gitignore file, and there are templates everywhere as well. I found one of the best sources to be GitHub’s own article on how to ignore files,
here. First thing to keep in mind is that you can:
- Ignore files locally, at a repo-level, with a
.gitignorefile; - Ignore files at a user-level;
- Ignore files locally, at a repo-level, but without a
.gitignorefile.
In this example, we will create a .gitignore file at the repo-level and we will make it exclude the .DS_Store file, and all files for a given extension in a subfolder we will create below. First, let’s create an empty file in bash:
$ touch .gitignore
In bash, the touch command with a filename next to it allows you to create a blank file. We will add to it what we want excluded in a bit. First, let’s create a subdirectory and two files — a text file and a Python one — that we will later exclude.
$ mkdir temp-subfolder
$ cd temp-subfolder/
$ touch temp-textfile.txt
$ touch empty.py
We can check all the content (hidden files included) of our “Projects” folder by running the ls -a command:
$ ls -a
.		.DS_Store	.gitignore	hello-world.py
..		.git		hello-mars.py	temp-subfolder
As seen above, the .gitignore file and the temp-subfolder subdirectory have been successfully created. Furthermore we can see the content of our subdirectory as well:
$ ls -a temp-subfolder/
.			empty.py
..			temp-textfile.txt
For both cases, the . and the .. represent the directory and the parent directory, respectively, and this belongs to how Unix- and Linux-based systems intrinsically manage directories (check
here for a deeper explanation). These are like shortcuts and they will not be tracked, so let’s not worry about them. (Note for Mac users: the .DS_Store file is automatically created when you create a new folder using Finder).
So now that we have added all these files, let’s run a git status:
$ git status
On branch master
Untracked files:
  (use "git add <file>..." to include in what will be committed)

	.DS_Store
	.gitignore
	temp-subfolder/

nothing added to commit but untracked files present (use "git add" to track)

$ git status temp-subfolder/
On branch master
Untracked files:
  (use "git add <file>..." to include in what will be committed)

	temp-subfolder/empty.py
	temp-subfolder/temp-textfile.txt

nothing added to commit but untracked files present (use "git add" to track)
As seen above, git status has “noticed” all the new files we have created in the working directory. Now, let’s make .gitignore exclude both the .DS_Store file and every .txt file in the working directory. We can do that using bash as follows (first make sure you have gone back to the “Projects” folder, using cd ..):
$ cat > .gitignore
.DS_Store
*.txt
Tip: After introducing *.txt, press Return to create a new line, and press Ctrl + D to close the file. If you check the .gitignore file using your text editor, it should contain just the following:
.DS_Store
*.txt
Now, if you run git status again, you will see that git is no longer “noticing” the DS_Store file nor any .txt file:
$ git status
On branch master
Untracked files:
  (use "git add <file>..." to include in what will be committed)

	.gitignore
	temp-subfolder/

nothing added to commit but untracked files present (use "git add" to track)

$ git status temp-subfolder/
On branch master
Untracked files:
  (use "git add <file>..." to include in what will be committed)

	temp-subfolder/empty.py

nothing added to commit but untracked files present (use "git add" to track)
If you want a fast way to learn how to write a .gitignore file, check out this
link from git.
Before moving over to the next section, don’t forget to add the new files to the index with git add *.
11. More Commits and the Log #
git logdocumentation.
So now you are a pro at adding files and, after adding those last objects to our working directory, we are ready to make our second commit. Let’s proceed with that:
$ git commit -m 'Second commit: Added a subfolder and an empty Python file'
[master 929288c] Second commit: Added a subfolder and an empty Python file
 1 file changed, 0 insertions(+), 0 deletions(-)
 create mode 100644 temp-subfolder/empty.py
As time goes by, you will keep adding and commiting more objects. If you want to see the history of your current branch — that is, the master branch for now (the only one you have) — you can use git log:
$ git log
commit 929288c07d11c102dd1c9e150551de2d303c95f5 (HEAD -> master)
Author: Your Name <yourname@mail.com>
Date:   Tue Aug 6 16:44:53 2019 -0400

    Second commit: Added a subfolder and an empty Python file

commit 7c30d2555ebef5540b00caf323107a89b9089b32
Author: Your Name <yourname@mail.com>
Date:   Tue Aug 6 16:39:15 2019 -0400

    First two Python scripts. hello-mars.py includes a second print line.
The git log command returns a list of the commits you have made in the current branch in inverse-chronological order. It also explicitly states in which branch you are at, (HEAD -> master). The HEAD, in git, is a pointer — it is git's way to point to the current commit, and therefore branch (remember that a branch is a sequence of commits). Furthermore, as previously explained, each commit we did returned a short SHA-1 value — for the first commit it was 7c30d25 and for the second one 929288c. We can see in git log's return the full SHA-1 value of each of the commits we made.
You can find practical information about git log and how to use it to get customized returns
here.
12. Creating a Repository on GitHub #
In this section, we will create a repository on GitHub. You should have created a GitHub account by now.
Now, for the sake of this tutorial, you will create a GitHub repo that will include a README.md file and a license. The README.md file allows you to put a “cover” to your repo — it will be automatically shown below the list of files and folders in your repo. The license is not mandatory, and GitHub offers you a number of templates that you can choose to add to your repository automatically.
To create a GitHub repository, go to
GitHub, click on the + symbol on the top right corner of the screen, and choose New repository. Once the “New Repository” page is loaded, fill in a name for your repository. For this tutorial, we will call the new repo example-repo.
Below, add a short description of what this repo is all about (this information is going to be added to README.md, but you can change it afterwards if you want). Then, set the repository to Public — after all you want to showcase your work — and check on the Initialize this repository with a README box. Finally, click on the Add a license: button and choose the MIT license (it is a very generic license, but be sure to read it before you agree to it). Your final setup should look something like this:

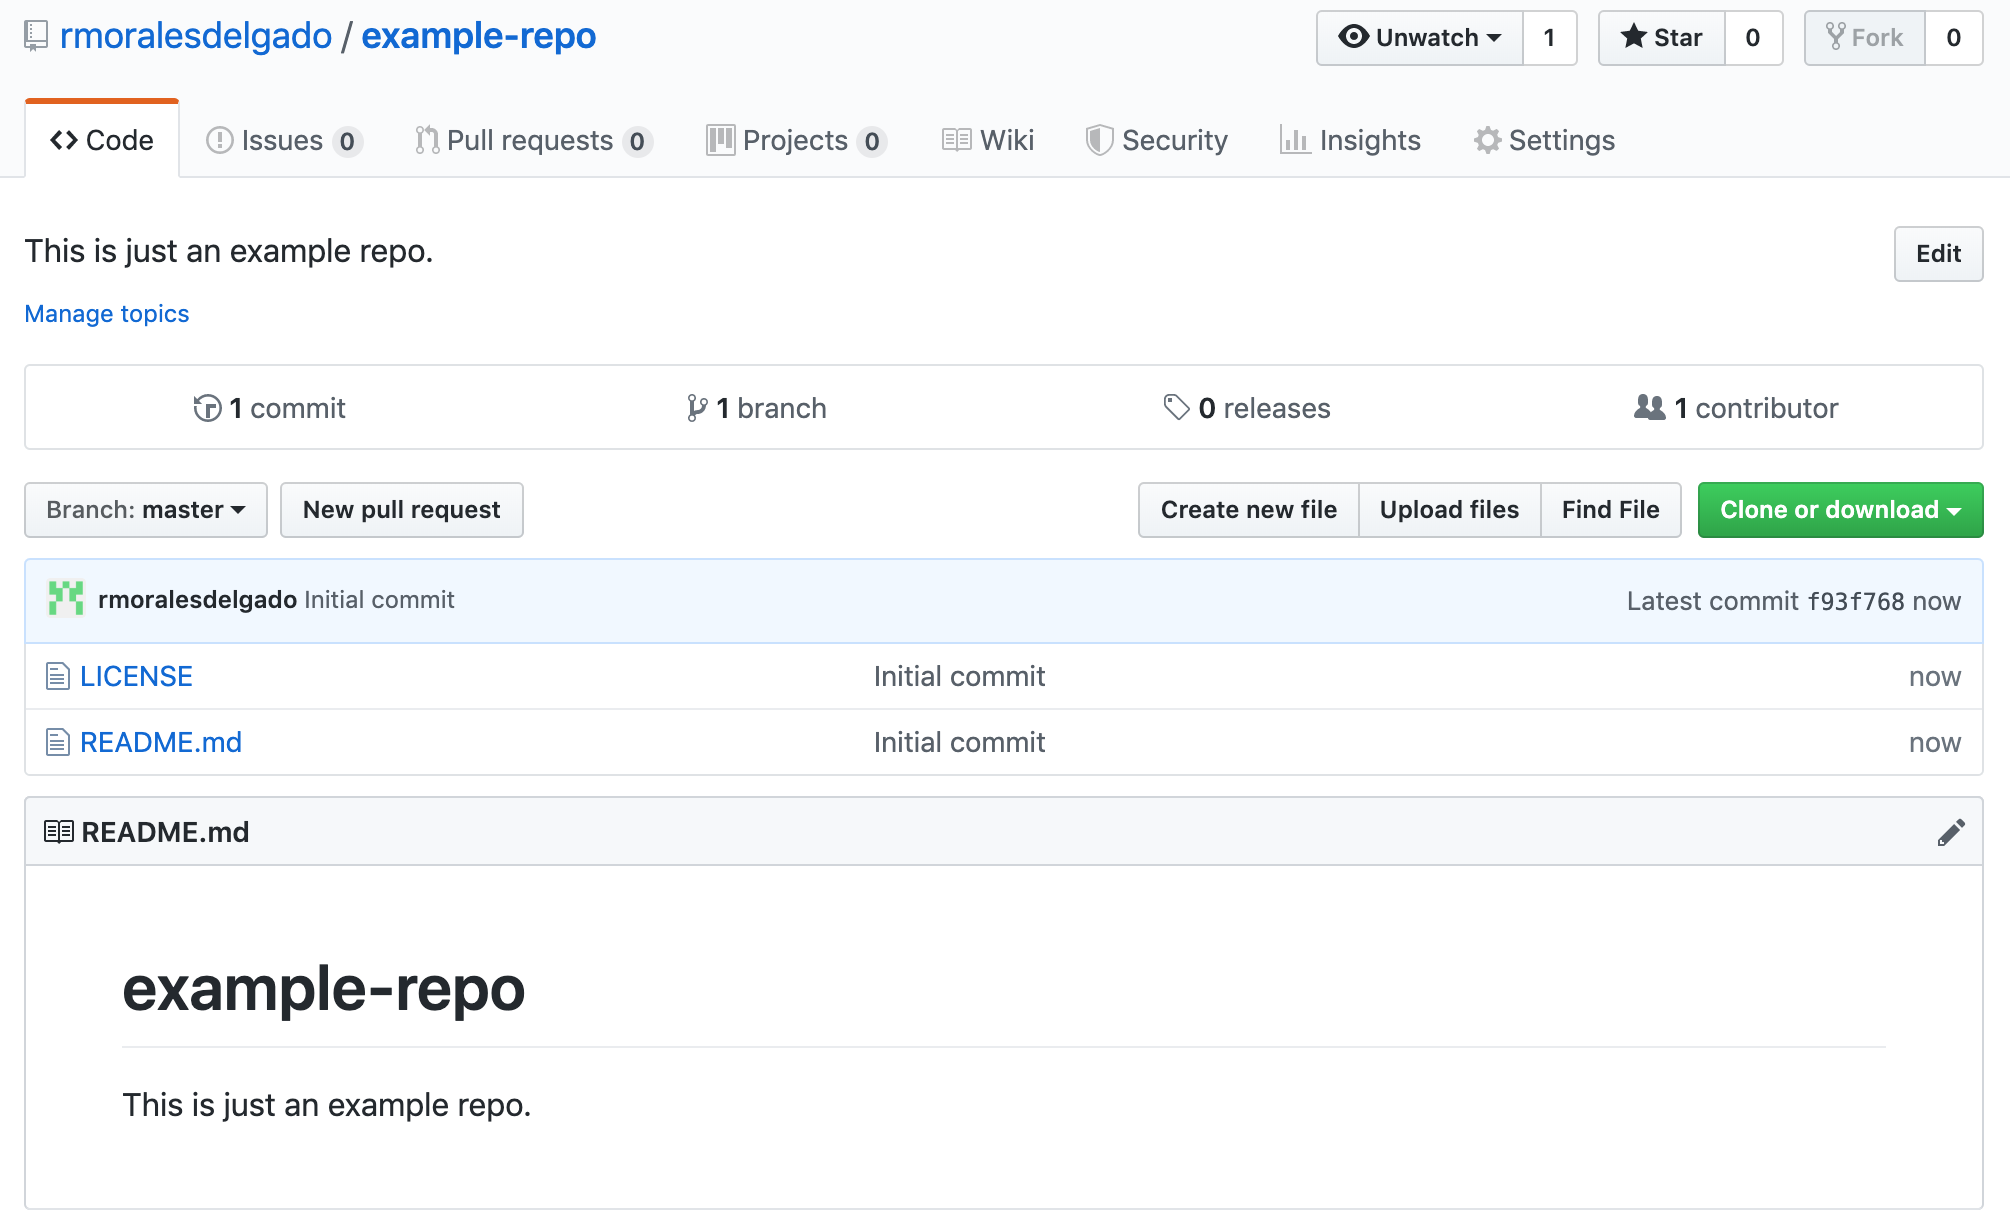
Finally, click on Create repository. Your new repository should look as follows:
13. Setting Up the Remote Repository #
git remotedocumentation.
Now that your GitHub repository is ready, the following step is to configure your local repository so that it can “sync” with the one on GitHub.
So, back in bash in your working directory, we will use the git remote command to have git do operations in a remote repository. This makes a more tangible difference between local and remote repositories. To add your remote repository to your local one (it is always this way — you add the remote repository to the local one), run the following:
$ git remote add origin https://github.com/<Your GitHub Account>/example-repo.git
This command will yield no return, but you can check if it was properly set up by running git remote -v:
$ git remote -v
origin	https://github.com/<Your GitHub Account>/example-repo.git (fetch)
origin	https://github.com/<Your GitHub Account>/example-repo.git (push)
Important note: Do not forget to add the .git at the end of the GitHub’s repository URL. For instance, if I load my example-repo on GitHub, the URL will be https://github.com/<Your GitHub Account>/example-repo. However, to set the remote repository, you need to add the .git.
You can find more information about working with remote repositories here.
14. Cloning and Forking #
git clonedocumentation.
In this section, cloning and forking will be explained. This is useful if there is an existing project you want to collaborate with, or just a repo that you want to work with by copying it to your computer. However, note that there is an important difference between cloning and forking that is related to the workflow — your workflow — rather than what these operations do.
14.1 Cloning #
git clone allows you to clone an entire repository that is yours or someone else’s — that is, to make an exact copy of all the objects in that repository to a local directory of your choice. This will include the .git/ subdirectory (which you can’t see on GitHub) that includes all the repository data (e.g. revision history).
Assume you want to develop your own Pandas, the Python package for data manipulation. To do this, you can clone the Pandas’ repository to your computer and into a specific directory. This can be done by copying the cloning path of the Pandas repo (it’s the repo’s URL + .git) by clicking on the green Click or download button, and then running:
$ git clone https://github.com/pandas-dev/pandas.git my_own_pandas/
The above command will clone the Pandas repo inside a folder called my_own_pandas/. Also, the remote paths for pushing and pulling will be automatically set as well — git will know where to push and fetch from, as will be later explained.
You can find a very useful tutorial about git clone
here.
14.2 Forking #
Forking is an operation done at the remote-level — on GitHub —, that allows you to clone someone else’s GitHub repo into your own GitHub account, thus creating a forked repository. The main idea here is that a forked repository will exist on your GitHub account such that you can add it as a remote repository on your computer. By doing so, you can work locally, push your work to the remote forked repository when you are done working, and finally send these modifications you made to the owner of the repository, via a pull request. The owner of the repository will then decide if he or she wants to add these modification to his/her repository.
Note that, while cloning someone else’s repository will still automatically set the remote repository, you cannot push modifications to this repo since it is not yours — you will only be able to do this if you have been set as a collaborator.
The workflow for working with a forked repository will be detailed below and will continue the Pandas example — we are going to fork the Pandas repository to be able to later collaborate with this project. The way to do it is as follows:
- Fork the original repository to you GitHub account, by clicking on the
Forkbutton on the top-right. You can find the Pandas repo here; - Clone the forked repository to your local computer, such that you can have a working directory that you can work on:
$ git clone https://github.com/<Your GitHub Account>/pandas.git my_own_pandas/
This will clone the forked Pandas repo into the my_own_pandas/ directory.
3. Go to the directory where the forked repo was cloned to and verify that the remote origin is properly set; run:
$ git remote -v
origin	https://github.com/<Your GitHub Account>/pandas.git (fetch)
origin	https://github.com/<Your GitHub Account>/pandas.git (push)
Finally; 4. Set up the upstream repository, such that you can sync your fork with the upstream repo — with the one of the owner’s —:
$ git remote add upstream https://github.com/pandas-dev/pandas.git
You can verify the whole setup one last time:
$ git remote -v
origin	https://github.com/<Your GitHub Account>/pandas.git (fetch)
origin	https://github.com/<Your GitHub Account>/pandas.git (push)
upstream	https://github.com/pandas-dev/pandas.git (fetch)
upstream	https://github.com/pandas-dev/pandas.git (push)
Setting up origin and upstream will allow you to sync local-fork and local-upstream, respectively. By doing so, you can keep your fork in sync with the upstream repo. This process will be shown in the following sections.
The steps followed in the last subsection can be found on GitHub, here.
15. Pushing and Pulling #
git pushdocumentation.git pulldocumentation.
The commands git push and git pull will be reviewed in this section. If you are “standing” in your local repository, the words push and pull become a bit more clear. push refers to the act of sending something to the remote repo, and pull to the act of getting something from it.
15.1 On your own repository #
As we move forward with our work locally, we are going to want to “sync” our local repository to the one on GitHub. We do this by pushing our local repo to the remote one. Now, in our example, we had two files and a subfolder with one file, and we are going to try to push all this content — which, by the way, has already been committed, so it is ready to be pushed — to our remote repository, example-repo.
$ git push origin master
Username for 'https://github.com': <Your GitHub Account>
Password for 'https://<Your GitHub Account>@github.com':
 ! [rejected]        master -> master (fetch first)
error: failed to push some refs to 'https://github.com/<Your GitHub Account>/example-repo.git'
hint: Updates were rejected because the remote contains work that you do
hint: not have locally. This is usually caused by another repository pushing
hint: to the same ref. You may want to first integrate the remote changes
hint: (e.g., 'git pull ...') before pushing again.
hint: See the 'Note about fast-forwards' in 'git push --help' for details.
Now, here comes the interesting part, and also the reason why I asked you to create those README.md and License files when creating the GitHub repo. First of all, if it is the very first time you are setting up a remote repository on GitHub, git will ask you for a username and a password. That is, your GitHub’s username and the password for that account. Next, git will try to push your local repository to the remote one, and it is going to fail.
The reason why it fails is that, when you created the README.md and the License files, the repository on GitHub was initialized and a history of commits was started when these files were added to the repository (read the hint) — these files are the first commit in example-repo. Because of this, when you try to push your local repository, the remote one is going to reject your push because it is going to notice that the commit histories of both repositories do not match at all.
In a broader sense, when you add a remote repository — a bare-repository on the server side that has one or many clients to interact with —, it becomes the “governing” one: your workflow between git and GitHub must consider the remote repository as the one that holds the “official” version that you and other collaborators hold as the original one. In other words, you can do whatever you want on your own local repo, but never jeopardize whatever is in the remote one. In consequence, continuing with our example, you will only be able to push your commits as long as you have first brought your local one up-to-date — as you have “synced” everything from the remote repository first into your local repository. From the hint, we will perform a git pull now:
$ git pull origin master
warning: no common commits
remote: Enumerating objects: 4, done.
remote: Counting objects: 100% (4/4), done.
remote: Compressing objects: 100% (3/3), done.
remote: Total 4 (delta 0), reused 0 (delta 0), pack-reused 0
Unpacking objects: 100% (4/4), done.
From https://github.com/<Your GitHub Account>/example-repo
 * branch            master     -> FETCH_HEAD
 * [new branch]      master     -> origin/master
fatal: refusing to merge unrelated histories
Now we tried to do a git pull, and again, it failed. So what happened now? I am not trying to waste anyone’s time but there is an important lesson here. git started pulling the commits from the remote repo but, before completing its task, it had a “fatal error”: it was not able to merge the unrelated histories. This is the same thing that happened when we tried to push our repo: the commit histories of both repositories are entirely different —even the root-commits are different —, and because of that, git does not know how to “order” the commits. If we think of commits as snapshots, then think of it as snapshots of two very different things — if you try to order them into a single history, you will not be able to know how to do it because they tell unrelated stories. Furthermore, you can check that the pull was not successful by running a ls in your working directory.
$ ls
hello-mars.py	hello-world.py	temp-subfolder
As seen above, there is no README.md nor License files. If the git pull were successful, we would see these files in our working directory. What we have to do now, is to make git “merge” these unrelated histories.
15.2 On a cloned or forked repository #
After cloning a repository, whether it was directly cloned from the original repository (the repo’s owner) or forked to your GitHub and then cloned to your computer, the remote origin will be automatically set up for you — there will be remote fetch and push URL’s, as shown in the previous section after running git remote -v. However, as explained in the previous section, there are some difference as to what you can push and pull, depending on which operation you did.
If the repository was just cloned from the original one, you will be able to keep your clone in sync with the original one via git pull. However, because the remote repo does not belong to you (again, unless you were set as a collaborator), you will not be able to push anything to that repository.
On the other hand, if you are working with a fork, then you will be able to pull and push content to your fork, and later on, send a pull request to the original owner such that he or she can merge these modifications into the original one. The process of doing this — the workflow —, however, may vary depending on the complexity of your collaboration to the project.
If you are working on a small project — few people involved — then the workflow can happen entirely on the master branch. This workflow will look something like this:
- Do your work on the master branch and commit as you go;
- When you’re done working, pull the latest version of the
upstreamrepo — the original one —:
$ git pull upstream master
- Once your local repo is in sync with the
upstreamone, proceed to push your commits toorigin— your forked repo —:
$ git push origin master
- Finally, send the owner of the original repo a pull request such that your modification can be merged. You can learn how to create a pull request from a forked repo in this article from GitHub.
Note, however, that collaborating via a forked repo can have different workflow complexities depending on the size of the project and number of contributors. In this sense, this tutorial will not delve into a more complex example, but still
here is a very good tutorial that includes creating a separate branch for your collaboration, syncing using rebase, and so on. You will learn the basics of pulling with rebase in the following section.
16. Rebasing On a Remote Branch #
- Documentation
git rebase, here.
In this section, we will use the git pull --rebase command to make unrelated commit histories form a single and unified history.
16.1 On your own repository #
As the name of the flag reveals, --rebase consists on grabbing one history — a branch — and using it to rebase another one on top of the first one. That is like grabbing one pile of snapshots and stacking them over the other pile. When you git pull --rebase, the remote history of the branch you are on will be the new base, and the local history will be rebased on top of the remote one, thus generating a single history.
$ git pull --rebase origin master
From https://github.com/<Your GitHub Account>/example-repo
 * branch            master     -> FETCH_HEAD
First, rewinding head to replay your work on top of it...
Applying: First two Python scripts. hello-mars.py includes a second print line.
Applying: Second commit: Added a subfolder and an empty Python file
As stated in the return of the command, the head is being rewinded to put your work — your local work — on top of it. If you run a ls now, you will see that the remote files are in your working directory:
$ ls
LICENSE		README.md	hello-mars.py	hello-world.py	temp-subfolder
Finally, now that we have a unified history — a common root commit, the one from the remote repo —, we can push our local repo to GitHub:
$ git push origin master
Enumerating objects: 9, done.
Counting objects: 100% (9/9), done.
Delta compression using up to 4 threads
Compressing objects: 100% (6/6), done.
Writing objects: 100% (8/8), 841 bytes | 841.00 KiB/s, done.
Total 8 (delta 1), reused 0 (delta 0)
remote: Resolving deltas: 100% (1/1), done.
To https://github.com/<Your GitHub Account>/example-repo.git
   f93f768..1e1491d  master -> master
From the return above, the f93f768..1e1491d tells us the range of commits that have just been “synced”. The master -> master tells as that we have pushed our local master branch to the remote master branch. Also, if you check your GitHub repository now, you will find in it all the files you had previously committed in your local repository.
The rebased log
Because you did a pull --rebase, you will now have a single and unified history of commits. You can check that out using git log:
$ git log
commit 1e1491de09a0c1515ba23c56447af2bba6a65620 (HEAD -> master, origin/master)
Author: Your Name <yourname@mail.com>
Date:   Tue Aug 6 16:44:53 2019 -0400

    Second commit: Added a subfolder and an empty Python file

commit ecb4f8f721856017f9d4dac6768e97f4988f8a6e
Author: Your Name <yourname@mail.com>
Date:   Tue Aug 6 16:39:15 2019 -0400

    First two Python scripts. hello-mars.py includes a second print line.

commit f93f76822a3c1b405a215ed4689f44f74b72e2b4
Author: <Your GitHub Account> <41495685+<Your GitHub Account>@users.noreply.github.com>
Date:   Fri Jul 26 20:57:38 2019 -0400

    Initial commit
As expected, the first commit (i.e. the root commit), f93f768, is the one from GitHub, and on top of this commit are the ones we made locally, ecb4f8f and 1e1491d. However, note that the last two commits (the local-made ones) have different SHA-1 values than when they were first made. The reason for this is rebase. The rebase command (it is a command, although also a flag for the pull command) intrinsic function is to let you rewrite histories. In this sense, when we rebase one history on top of another one, the one at the bottom — e.g. the one from the GitHub repo — stayed the same, while everything on top of it was rewritten (and by everything, I mean everything). The rebase function is very useful but you need to be careful with it, since it does rewrite histories (sequence of commits).
We will not delve into all the rebase command can do, although there are some helpful links to try to understand how it works on a practical level. First, you can find a very good explanation about git rebase
here, and a more in-depth explanation about why doing a rebase instead of a merge (in practical terms, git pull = git fetch + git merge FETCH_HEAD, as stated in git's
documentation),
here.
Finally, you can find the official documention about git pull --rebase
here.
16.2 On a forked repository #
In this subsection, I will not explain how to do a git pull --rebase on a forked repo since this includes branching, it is outside the scope of this tutorial, and there is a helpful link about this at the end of the previous section. However, I am just going to explain why would you use it.
When working on a project that involves several contributors and a central forked repository, the workflow requires that each contributor develops its work on its own fork and in a separate branch, one different than the master branch — master is usually reserved for the final or official version. Everytime a contributor is done with its work, he or she will first pull the current version of upstream master (to have its latest version and be in sync), and then will send a pull request to the repo owner such that its branch with its work can be pulled into the master one, thus having its work become part of this final version. Because this is an ongoing process, by the time you finished your work, the master branch from where you started to develop your work will have changed. At this point, there is always the option to pull it and have git merge, in a chronological order, the upstream commits on master and the ones you made in the branch of your fork. However, this can go awfully wrong. One point from the link I mentioned above is that commits will be all scattered — say the upstream branch has 20 new commits since you cloned it, and your work produced 10 more. Both sets of commits will most likely follow a certain logical order — they follow a sequence. If they are just merged, they will end up interspersed.
The second and probably biggest problem, is that if you just merge both branches, you will be “altering the past.” Let me explain this. Imagine that you are ready to pull from upstream master (to then create a pull request). Those 20 commits I mentioned before are already there. If you just merge, you will be inserting your ten scattered inbetween those 20. Imagine also that another contributor has just created a clone from upstream master (including those 20 commits, but before you merged your 10). When that person is done working, he or she will proceed to find the latest version of the upstream master before creating his/her pull request. If you did just merge your commits among those 20, when that person tries to merge its branch, git will realize that the master he or she had, and the current one, have a different commit history — there are 10 new commits that did not exist before. Solving this issue is possible but can be a lot of work, and it will affect everyone in your team.
17. Tracking Branches #
git branchdocumentation.
While we are not delving into branches in this tutorial, in this section we are still going to show how to identify which branches from a remote repository are being tracked — these are also called remote-tracking branches. The importance of this is quite simple: it enables us to ease collaboration by knowing where are we pulling from and pushing to.
There are two easy ways to see both local and remote-tracking branches. First, let’s use git branch:
$ git branch -a
* master
  remotes/origin/master
The command git branch -a (-a stands for “all”) allows you to list all the local and remote-tracking branches. The branch name preceded by a * is the “current” branch — where the HEAD is pointing to at the moment. While useful, this command does not allow us to see the relationships between the branches — which local branch is tracking which remote branch. Given that in our own repository example we only have one local branch, called master, and one remote branch, called master as well, it is easy for us to know that these two are the ones called when we run git pull or git push. Additionally, we add origin master at the end of both previous commands to be explicitly clear about which branch from origin we want to push or pull, respectively.
However, if we start working in a repository with more branches, like the Pandas fork, this is no longer possible. To get a more detailed list of our local and remote-tracking branches, we use git remote show <repository>:
$ git remote show origin
* remote origin
  Fetch URL: https://github.com/<Your GitHub Account>/pandas.git
  Push  URL: https://github.com/<Your GitHub Account>/pandas.git
  HEAD branch: master
  Remote branches:
    0.19.x                  tracked
    0.20.x                  tracked
    0.21.x                  tracked
    0.22.x                  tracked
    0.23.x                  tracked
    0.24.x                  tracked
    0.25.x                  tracked
    gh-pages                tracked
    master                  tracked
    revert-25761-patch-1    tracked
    revert-29447-orc-reader tracked
    v0.25.2.x               tracked
  Local branch configured for 'git pull':
    master merges with remote master
  Local ref configured for 'git push':
    master pushes to master (up to date)
As shown above, the git remote show origin command allows us to get a better picture not only of the local and remote-tracking branches, but also of which branch is pushing to which branch. By default in a fork, only the local master branch is automatically configured to pull and push to/from the remote master one. If we try the same thing with the upstream repository — the original one — we will notice two things:
$ git remote show upstream
* remote upstream
  Fetch URL: https://github.com/pandas-dev/pandas.git
  Push  URL: https://github.com/pandas-dev/pandas.git
  HEAD branch: master
  Remote branches:
    0.19.x                  tracked
    0.20.x                  tracked
    0.21.x                  tracked
    0.22.x                  tracked
    0.23.x                  tracked
    0.24.x                  tracked
    0.25.x                  tracked
    gh-pages                tracked
    master                  tracked
    revert-25761-patch-1    tracked
    revert-29447-orc-reader tracked
    v0.25.2.x               tracked
  Local ref configured for 'git push':
    master pushes to master (local out of date)
The first thing to notice is that our local master is only configured for pushing, not pulling. The second one, is that our local one is already out of date — some contributor has already added some new commits to upstream master and our local master is not in sync anymore.
In the next section, we will show how to set a default upstream branch to pull from and to push to for our current local branch.
The origin master and the upstream master
This is additional content, so feel free to skip it if you want.
Up to this point, you must have realized that the terms origin, master and upstream have popped up quite a bunch of times. But, are they commands or flags? Well, neither. The words origin, master and upstream have no real meaning to git; they are a convention.
The name origin is an alias we give to the remote repository we are tracking — we do set it on purpose when we are setting up the remote repo by running git remote add origin https://.... We can replace the word origin by any other to name the repository we are referring to. Usually, we name origin to the “main” repo, where the core source code is located. In the same way, we name upstream to the original repository where we made our fork from. As seen, git allows to set multple aliases for remote repositories because your local repository can track multiple remote repos. When we run git show remote origin, we are asking git to show us the remote repository under the alias origin. If we only run git remote show, git will show us the list of remote repositories we are tracking:
$ git remote show
origin
upstream
In our case, we have set origin and upstream, thus they are the only ones showing up.
In the case of master, it is assigned by default in both git and GitHub to the branch that is created when you initialize a repository. However, you can change this default name to whatever you want.
You can find a very good Stack Overflow explanation on these conventions here (and also on how to change the “master” name to something else).
18. Setting Default Remote Branches #
In this section, we will show how to set, for a local branch, a default remote branch for pulling and pushing.
18.1 Working with a forked repository #
As previously showed, we forked the Pandas repo and added two remote repositories to our local clone: an origin one (the fork) and an upstream one (the original one). Also, as shown in the previous section, by default, git sets the origin master branch to be the default branch for pulling and pushing for our local master. However, since upstream master is the one with the official version, we need to set this branch as the default branch to pull from. To do this, we use the git branch command:
$ git branch -u upstream/master
Branch 'master' set up to track remote branch 'master' from 'upstream'.
Now, we have set our local master branch to track upstream/master. Note that here the syntaxis demands the use of upstream/master and not upstream master.
If we check on upstream, we can find that some new commits have been added it was forked and cloned (i.e. (local out of date)):
$ git remote show upstream
* remote upstream
  Fetch URL: https://github.com/pandas-dev/pandas.git
  Push  URL: https://github.com/pandas-dev/pandas.git
  HEAD branch: master
  Remote branches:
    0.19.x                  tracked
    0.20.x                  tracked
    0.21.x                  tracked
    0.22.x                  tracked
    0.23.x                  tracked
    0.24.x                  tracked
    0.25.x                  tracked
    gh-pages                tracked
    master                  tracked
    revert-25761-patch-1    tracked
    revert-29447-orc-reader tracked
    v0.25.2.x               tracked
  Local branch configured for 'git pull':
    master merges with remote master
  Local ref configured for 'git push':
    master pushes to master (local out of date)
Also, it can be noticed that now the Local branch has been configured for 'git pull'. If we proceed with this pull (now without the necessity of indicating which branch to pull from), we will get something like this:
$ git pull
remote: Enumerating objects: 204, done.
remote: Counting objects: 100% (204/204), done.
remote: Compressing objects: 100% (4/4), done.
remote: Total 234 (delta 200), reused 203 (delta 200), pack-reused 30
Receiving objects: 100% (234/234), 128.94 KiB | 2.48 MiB/s, done.
Resolving deltas: 100% (201/201), completed with 92 local objects.
From https://github.com/pandas-dev/pandas
 * branch                master     -> FETCH_HEAD
   37dfcc1ac..f36eac171  master     -> upstream/master
Updating 37dfcc1ac..f36eac171
Fast-forward
 .travis.yml                                            | 35 ++++++++++++++++---------------
 README.md                                              |  2 +-
...
 pandas/tests/test_expressions.py                       |  4 ++--
 setup.py                                               | 65 +++++++++++++++++++++-------------------------------------
 web/pandas/about/index.md                              |  4 ++--
 49 files changed, 461 insertions(+), 212 deletions(-)
 mode change 100755 => 100644 doc/source/whatsnew/v1.0.0.rst
Although the last configuration did set up the default push to upstream/master as well, in my experience it is better to set the defaults for pulling (we always need to be pulling from upstream/master) than for pushing (which in this case would correspond to origin/master). Even if we run a git push, git will tell us that we do not have permission to push to upstream — which makes sense since that repo does not belong to us.
Now, to finish with what our simulated workflow, we have to push our recently updated local master to origin master:
$ git push origin master
Total 0 (delta 0), reused 0 (delta 0)
To https://github.com/<Your GitHub Account>/pandas.git
   37dfcc1ac..f36eac171  master -> master
Finally, if you want to be sure that origin/master and upstream/master are in sync, you can run:
$ git diff origin/master upstream/master
If there is no return, then both branches are in sync.
18.2 Working on our own repository and merge-commits #
In this subsection, we will continue the example-repo example by modifying a couple files to have something to pull and then to push — we will modify a file directly on GitHub (to simulate having someone updating files in the remote branch) and a file locally (to simulate the constant development of our local work). If you have files of your own, you can do this on your own files. If not, follow along.
On GitHub, I have modified hello-world.py by adding one extra line and commited the changes in the “Commit changes” section: Updated hello-world.py by adding a new line. — this is the commit’s message. Finally, I left the Commit directly to the master branch. option checked and clicked on the Commit changes button.
Also, locally on my text editor, I modified hello-mars.py by also adding a new line. After saving the modification and I committed this modified file. A file can be committed “straight away” if it has been committed before and if it has the modified status. In one line of code:
$ git commit -am 'Updated hello-mars.py by adding a new line'
[master b224ffc] Updated hello-mars.py by adding a new line
 1 file changed, 1 insertion(+)
More specifically, above we used the -am flag, which is equivalent to typing -a -m, such that we can include a commit message. If we run a git log right now, we will see that the commit related to modifying hello-mars.py is already in the repository’s log. However, the one made on hello-world.py is not in the local repository yet:
$ git log
commit b224ffc30d9407544688cf95772f33f89e5ec5f1 (HEAD -> master)
Author: Your Name <yourname@mail.com>
Date:   Fri Aug 9 03:52:16 2019 -0400

    Updated hello-mars.py by adding a new line

commit 1e1491de09a0c1515ba23c56447af2bba6a65620 (origin/master)
Author: Your Name <yourname@mail.com>
Date:   Tue Aug 6 16:44:53 2019 -0400

    Second commit: Added a subfolder and an empty Python file

commit ecb4f8f721856017f9d4dac6768e97f4988f8a6e
Author: Your Name <yourname@mail.com>
Date:   Tue Aug 6 16:39:15 2019 -0400

    First two Python scripts. hello-mars.py includes a second print line.

commit f93f76822a3c1b405a215ed4689f44f74b72e2b4
Author: <Your GitHub Account> <41495685+<Your GitHub Account>@users.noreply.github.com>
Date:   Fri Jul 26 20:57:38 2019 -0400

    Initial commit
Merge-commits
As previously explained, before pushing something to a remote repository, we must first pull, such that our local repository is up-to-date with the remote one. We use git pull to do this:
$ git pull origin master
remote: Enumerating objects: 5, done.
remote: Counting objects: 100% (5/5), done.
remote: Compressing objects: 100% (3/3), done.
remote: Total 3 (delta 1), reused 0 (delta 0), pack-reused 0
Unpacking objects: 100% (3/3), done.
From https://github.com/<Your GitHub Account>/example-repo
 * branch            master     -> FETCH_HEAD
   1e1491d..fd92ccf  master     -> origin/master
hint: Waiting for your editor to close the file...
In this case, both the local master and origin master have diverged — each has a new last commit. When you run git pull origin master, you are actually executing a git fetch and a git merge, as mentioned earlier, and this merging process of two diverging branches requires a merge-commit. A merge-commit is the type of commit that happens when you merge branches — in our case, we are merging origin master into local master.
As stated in the hint of the code above, git is now waiting for you to write a merge-commit message in your text editor and to save and close the file, such that the merging process can be completed. Now you have to proceed to create a merge-commit message, for instance:
Updating local repository.

# Please enter a commit message to explain why this merge is necessary,
# especially if it merges an updated upstream into a topic branch.
#
# Lines starting with '#' will be ignored, and an empty message aborts
# the commit.
After saving and closing, the following will show up in the CLI:
Merge made by the 'recursive' strategy.
 hello-world.py | 1 +
 1 file changed, 1 insertion(+)
This return means that the merging was successful and it also states which strategy was used to complete the merge — recursive. You can get detailed documentation about merging strategies
here.
If we check the log now, we will see two main things: a) that the commit we made on GitHub when we modified hello-world.py has been added as well as the merge-commit (and note it references its two parent-commits, Merge: b224ffc fd92ccf); and, b) that it states where the HEAD of the local repo is at — commit 73f53659fe63ce4d22951feaf14a378cb94e182a (HEAD -> master) — and where it is in the remote repo — commit fd92ccffb99d416bb7c5ca755d2f24243e74ab2f (origin/master) —:
$ git log
commit 73f53659fe63ce4d22951feaf14a378cb94e182a (HEAD -> master)
Merge: b224ffc fd92ccf
Author: Your Name <yourname@mail.com>
Date:   Fri Aug 9 03:56:38 2019 -0400

    Updating local repository.

commit b224ffc30d9407544688cf95772f33f89e5ec5f1
Author: Your Name <yourname@mail.com>
Date:   Fri Aug 9 03:52:16 2019 -0400

    Updated hello-mars.py by adding a new line

commit fd92ccffb99d416bb7c5ca755d2f24243e74ab2f (origin/master)
Author: <Your GitHub Account> <41495685+<Your GitHub Account>@users.noreply.github.com>
Date:   Fri Aug 9 03:44:32 2019 -0400

    Updated hello-world.py by adding a new line.
The fact that the local HEAD differs from the remote one is logical — we still have not pushed our local repo into the remote one. Let’s proceed with that:
$ git push origin master
Enumerating objects: 9, done.
Counting objects: 100% (8/8), done.
Delta compression using up to 4 threads
Compressing objects: 100% (5/5), done.
Writing objects: 100% (5/5), 584 bytes | 292.00 KiB/s, done.
Total 5 (delta 3), reused 0 (delta 0)
remote: Resolving deltas: 100% (3/3), completed with 2 local objects.
To https://github.com/<Your GitHub Account>/example-repo.git
   fd92ccf..73f5365  master -> master
If we run git log one last time, we will notice that now the HEAD is at the same commit in both local and remote repositories: (HEAD -> master, origin/master).
As seen in the previous two subsections, this process is very common — you will work with people who will push their own code to the repository on GitHub and, when you are about to push yours, you will realize that because the remote has been updated, you will have to pull it first. After this, you will be able to finally push your commits. Here, too, we can set the upstream branches. This allows us to just use git push and git pull on the local branch without having to add origin master every single time.
Setting up the default remote branch
A different way to set the default remote branch is by using git push with the desired remote branch:
$ git push -u origin master
Branch 'master' set up to track remote branch 'master' from 'origin'.
Everything up-to-date
As stated above, the local master branch has now been set up to track origin/master when you run git push and git pull. This would be the same as running:
$ git branch -u origin/master
Branch 'master' set up to track remote branch 'master' from 'origin'.
In both cases, the flag -u stands for --set-upstream.
Now, you can freely run just $ git push and $ git pull without the necessity of adding origin master.
Here, even though we have got the same return as before, it must be noted that now the local master branch has been set up to track origin/master when you run git pull. You can ascertain the state of your remote-tracking branches running $ git remote show origin.
As a final note, in our example, setting upstream branches is a bit of an overkill given we only have one local and one remote branch. However, when you work with several branches, and specially if you want to have local branches whose names are different from the ones you want them to remote-track, then setting an upstream branch for each of them is a very useful thing to do, since you can forget about making the mistake of pulling from or pushing to the wrong remote branch.
19. Tracked Objects and Filtering by Status #
git ls-filesdocumentation.git ls-treedocumentation.
This is the final section. Here, we will show how to visualize the trees and files that git is tracking (and not tracking). As previously explained, once you initialize a git repository, git becomes able to “see” all objects in that working directory. Furthermore, once you add objects, git indexes these objects and tracks any changes you make to them. You can always decide not to track a file, or to exclude it by using .gitignore. However, as you start amassing more and more files, you might start losing track about what is being tracked and what not. For instance, you might want to know which files have been deleted or modified, or which files are not being tracked (because you manually removed them from the index or because they are being excluded by .gitignore). While you can always see all the files on your working directory (with ls -a), seeing the repository’s objects requires a different set of commands.
The easiest way to see all the files being tracked by the repository is by using git ls-files:
$ git ls-files
LICENSE
README.md
hello-mars.py
hello-world.py
temp-subfolder/empty.py
A different command is also available, named git ls-tree:
$ git ls-tree --full-tree -r --name-only HEAD
LICENSE
README.md
hello-mars.py
hello-world.py
temp-subfolder/empty.py
As seen above, while both commands yield exactly the same result, each of them is highly customizable and can yield specific results that can be used as input for other commands. We will not delve into that, but we will show a couple practical use-cases for each of them.
The command git ls-tree specializes in returning trees of objects and requires a <tree-ish> [path] argument, which allows it to reference the branch and path we want it to show us. In this case, by passing in HEAD, we are asking the command to give us the tree of the master branch. We can, for example, ask git ls-tree to give us all the information of a subfolder of the working directory, including file size:
$ git ls-tree --full-tree -rl HEAD:temp-subfolder/
100644 blob e69de29bb2d1d6434b8b29ae775ad8c2e48c5391       0	empty.py
In this case, the 0 before empty.py is the file’s size, which is zero bytes because it has no content. This command also gives us the full SHA-1 hash of the object.
On the other hand, git ls-files allows us to get a customized list of files, that can be filtered by several different parameters, and that is the result of merging the working directory and the directory cache index (the index). For instance, as an example, let’s delete hello-mars.py:
$ rm hello-mars.py
If we get the repository status, we will find the following:
$ git status
On branch master
Your branch is up to date with 'origin/master'.

Changes not staged for commit:
  (use "git add/rm <file>..." to update what will be committed)
  (use "git checkout -- <file>..." to discard changes in working directory)

	deleted:    hello-mars.py

Untracked files:
  (use "git add <file>..." to include in what will be committed)

	.gitignore

no changes added to commit (use "git add" and/or "git commit -a")
Because hello-mars.py has been deleted but not committed yet, we can get a list of the deleted files using git ls-files and see this file in the list:
$ git ls-files --deleted
hello-mars.py
In this case, git ls-files is comparing the deleted files between the working directory — where the file is gone — and its index, where the file still exists. Now, to continue this example, let’s commit the changes:
$ git commit -am 'Deleted hello-mars.py from working directory.'
[master d3af4d9] Deleted hello-mars.py from working directory.
 1 file changed, 4 deletions(-)
 delete mode 100644 hello-mars.py
If we run again git ls-files --deleted, we will not find this file among the deleted ones, and this is because when said comparison happens, both lists of objects, the working directory and the index, show the same files. Thus, the command returns nothing for --deleted.
However, let’s suppose that you know someone deleted files in the last commit and you want to know which files were deleted. In this case, you can run git ls-files but passing in an argument such that git compares the working directory and a previous snapshot of the index:
$ git ls-files --deleted --with-tree HEAD~
hello-mars.py
Here, we are asking git ls-files to show us the --deleted files at a specific snapshot: the one corresponding to the tree (--with-tree) one snapshot ago — HEAD~. Note that if you want the entire list of deleted files with their corresponding commits, then probably the best way to do it would be by using git log --no-renames --diff-filter=D --summary.
As a second and final use-case for git ls-files, we will show how to get the ignored files:
$ git ls-files --others
.DS_Store
.gitignore
temp-subfolder/temp-textfile.txt
As expected, the git ls-files command returns the list of ignored files — whether ignored on purpose (what was added to .gitignore) or by default (the exclusion of .gitignore itself).
You can find the documentation of git ls-files
here.
Getting all the heads
While the HEAD in git is a pointer — it is an actual file that lets git know which is your working branch at the moment —, git does also store similar information for all branches, local and remote. These group of pointers is called heads.
Sometimes, it is important to know where — to which commit — each head is pointing to. To find this information, we use git show-ref:
$ git show-ref --head
73f53659fe63ce4d22951feaf14a378cb94e182a HEAD
73f53659fe63ce4d22951feaf14a378cb94e182a refs/heads/master
73f53659fe63ce4d22951feaf14a378cb94e182a refs/remotes/origin/master
As seen above, at the moment, all the heads are pointing to the same commit. This is because everything, both local and remote repositories, have been recently ‘synced’.
You can find the glossary definitions of both HEAD and heads
here.
20. Conclusion #
This tutorial, as stated at the beginning, was intended to be an introduction on Git and GitHub — particularly on how to make them work together and how to create useful substainable workflows. By now, you should have a (little) better understanding on how to use them — it took me more than a while to get acquainted with both of them and, more importantly, to start using them on a regular basis. In fact, I wrote this tutorial originally to remind myself how to do things, and by doing so I ended up exploring all these tools a little deeper.
If you liked these post, please feel free to visit my other posts on Git — some of them have slightly more advanced topics that might be useful to you someday.
I hope this was useful for you. Please let me know your thoughts in the comments!
21. Acknowledgements #
If there is any link, source or citation inadequately described or omitted, please let me know and I will fix it as soon as possible.
comments powered by Disqus